本文讲解如何在springboot中集成mybatis (注解方式)
spring Boot 支持两种方式集成mybatis,一种是使用注解,另一种是使用xml,两种方式各有优劣,注解方式简洁方便,不需要xml,xml方式可以直观的看到sql,方便sql优化
集成mybatis步骤
- 新建一个springboot项目
- pom.xml中引入mybatis和mysql的依赖
- 配置文件配置数据库链接属性
pom.xml引入mybatis,mysql依赖
pom.xml中的mybatis,mysql依赖可以在创建项目的时候勾选对应的依赖项
如果在构建项目是没勾选对应的依赖,可以在建完项目后,手动添加依赖,保证pom.xml有mybatis,mysql依赖就行
pom.xml对应的依赖
<dependencies>
    <!-- web -->
    <dependency>
       <groupId>org.springframework.boot</groupId>
       <artifactId>spring-boot-starter-web</artifactId>
    </dependency>
    <!-- mybatis -->
    <dependency>
       <groupId>org.mybatis.spring.boot</groupId>
       <artifactId>mybatis-spring-boot-starter</artifactId>
       <version>1.3.2</version>
    </dependency>
    <!-- mysql -->
    <dependency>
       <groupId>mysql</groupId>
       <artifactId>mysql-connector-java</artifactId>
       <scope>runtime</scope>
    </dependency>
    <!-- lombok -->
    <dependency>
        <groupId>org.projectlombok</groupId>
        <artifactId>lombok</artifactId>
        <optional>true</optional>
    </dependency>
    <!-- junit -->
    <dependency>
        <groupId>org.springframework.boot</groupId>
        <artifactId>spring-boot-starter-test</artifactId>
        <scope>test</scope>
     </dependency>
</dependencies>
application.yml 配置数据库属性,mybatis配置
application.yml 配置如下:
spring:
  #mysql配置
  datasource:
    driver-class-name: com.mysql.jdbc.Driver
    url: jdbc:mysql://127.0.0.1:3306/wtx?useUnicode=true&characterEncoding=utf8&useSSL=false
    username: root
    password: root
mybatis:
  configuration:
    #字段名与属性名不一致,设置驼峰转换
    map-underscore-to-camel-case: true
表结构
CREATE TABLE `user` (
  `id` int(11) NOT NULL AUTO_INCREMENT,
  `user_name` varchar(32) DEFAULT NULL,
  `pass_word` varchar(32) DEFAULT NULL,
  PRIMARY KEY (`id`)
) ENGINE=InnoDB AUTO_INCREMENT=6 DEFAULT CHARSET=utf8;
对应的域对象 user
/**
 * @auther: chenmingyu
 * @date: 2018/11/4 13:39
 * @description:
 */
@Data
public class User {

    private Long id;
    private String userName;
    private String password;
}
使用注解方式集成mybatis
- 使用@Mapper注解标记接口
- @Insert,@Update,@Delete,@Select注解标记方法,分别对应增删改查
/**
* @auther: chenmingyu
* @date: 2018/11/4 13:42
* @description:
*/
@Mapper
public interface UserMapper {
@Select("select * from user where id = #{id}")
User findUserByName(@Param("id") Long id) throws Exception;
@Insert("insert into user values (#{id},#{userName},#{passWord})")
int insert(User user);
@Update("update user set user_name=#{userName},pass_word=#{passWord} where id = #{id}")
int updateById(User user);
@Delete("delete from user where id=#{id}")
int deleteById(@Param("id") String id);
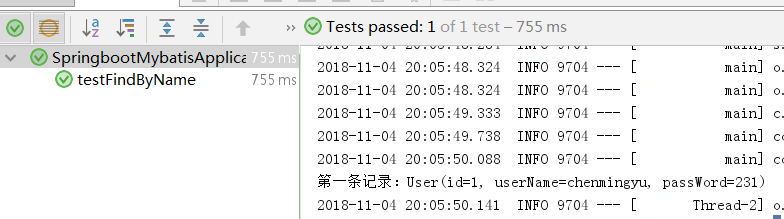
}使用junit测试mapper
@RunWith(SpringRunner.class)
@SpringBootTest
public class SpringbootMybatisApplicationTests {

    @Resource
    private UserMapper userMapper;

    @Test
    public void testFindByName() throws Exception {
        User user = userMapper.findUserByName(1L);
        System.out.println("第一条记录:"+user.toString());
    }
}
测试结果: